In this article, we will consider the steps on how to fix headphone problems when you encounter headphones not working in Windows 10 .
Some common problems you may encounter with your headphones include a damaged cable, headphone jack not working, Bluetooth connectivity problems, inability to sync audio with video, or turn noise canceling on or off.
If you are using a wired headset, the first thing to do is to check your control audio jack. Look for the audio output port, usually by the headset or speaker icon, on the side or back of your computer, and make sure that your headphone jack is properly connected.
Clean your computer's headphone jack. Dust, hair and dirt can block the connection between the jack and the headset. Check this and clean the jack with a cotton swab moistened with rubbing alcohol to remove lint and dust, or use a pressurized box if close. Reconnect the headphones and see if they work.
If your headset is wireless, turn on Bluetooth and your headset in Windows and pair the two devices again with bluetooth .
Try using an alternative headset to see if the problem is with your headset or computer. If the headphones are in good condition, the problem may be related to the drivers, operating system or other settings on the computer.

Make sure your headset is set as the default device. In this case, right-click the sound icon in the Taskbar at the bottom right of your computer and select “Open Sound Settings” to make sure your headset is selected and the volume levels are turned on.

You can also right-click the Volume icon on your taskbar and select "Turn on Volume Mixer" to control the computer's volume controls. Slide the volume up so you can hear the sound of your headset.
To open the Windows Troubleshooter, right-click the sound icon in your taskbar and select 'Troubleshoot Sound Problems'. Choose your headset and click Next.

If you get an alert asking you to turn on audio equipment, click No.
To open your sound troubleshooter, click Start> Settings to open Windows Settings, and then click 'Update & Security'.

Click on 'Troubleshoot' and select 'Audio Play'. Click on 'Run troubleshooter' and follow the instructions.
If you've checked your audio settings and other controls and they're all working fine, try restarting your computer to fix software errors that could cause your headset to not work on Windows.
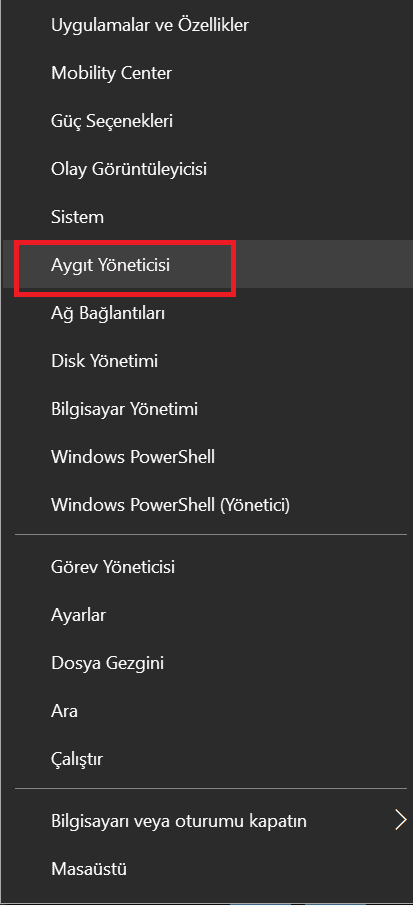
To open the device manager, right-click the Windows icon in the bottom left and click the Device manager.

In the device manager window, double-click the category "Audio, video and game controllers".
Check if your sound card driver has been updated. If it is not up to date, right click it and select Update driver. You can browse for the system to automatically search for updated driver software, or for software from the computer.

Alternatively, you can download the drivers from the sound card developer or the manufacturer's website. Be sure to download the latest driver for the version of Windows you are using.
If the latest update is not available, do your Windows update. If there is a problem after the Windows update, follow the steps below.
If you find that your headset is not working on Windows after installing Windows Update, uninstall the update and restart your computer.

To uninstall Windows update, go to Settings> Update & Security and then click Windows Update. Click on the "View update history" tab and click "Uninstall updates" at the top and uninstall the latest update.
If the headset problem occurred after installing a program, and even uninstalling the program did not work, you can restore your Windows system to any date the headset was running. You can see how to restore a system on a Windows computer from this article .
If none of the above fixes resolved the headphones that didn't work on Windows issue, if it's still under warranty, you need to show your computer or headphones to a mechanic. If the problem is with the headphones, you have no choice but to buy a new headset.